
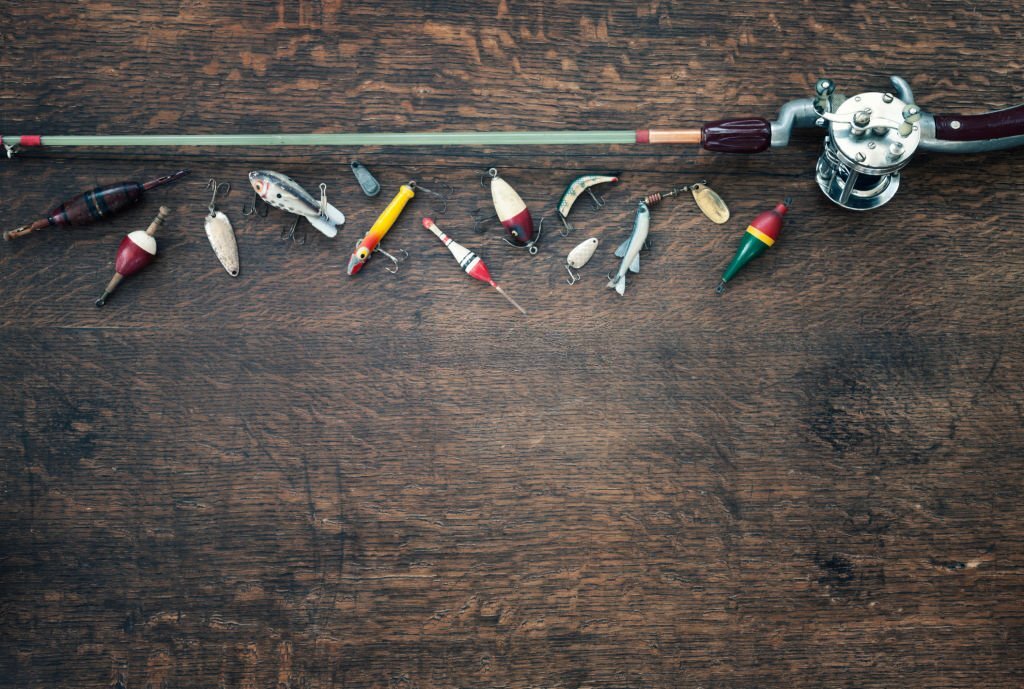
Keeping your fishing reel clean is essential for ensuring optimal performance and longevity. Over time, dirt, salt, and debris can accumulate inside the reel, leading to decreased efficiency and potential damage. Regular maintenance and cleaning will not only enhance the smooth operation of your reel but also prevent corrosion and extend its lifespan.
In this article, we will guide you through the step-by-step process of cleaning a fishing reel, from gathering the necessary tools to properly disassembling, cleaning, and reassembling the reel. By following these instructions, you’ll be able to maintain your fishing reel in top condition and enjoy many successful fishing trips for years to come. So let’s dive in and learn how to give your fishing reel the care it deserves!
Reel Cleaning Basics
Do a thorough cleaning of your fishing reel if you want to keep it in good condition. Every five to ten fishing trips, we advise cleaning your fishing reel. That only applies if you fish in freshwater. If you’re going fishing in salt water, you should really clean your gear every time you’re done. You already know how damaging saltwater fishing is to metal components.
What You Need
- Simple Green Marine All-Purpose Boat Cleaner
- Two small screwdrivers
- A toothbrush or small paintbrush
- Toothpicks
- Cotton swabs
- Tweezers
- Reel oil
- Empty container
- Soft cloth
- Blow dryer
Tools for Cleaning Fishing Reels
To guarantee a thoroughly clean reel, the correct equipment is required.
- A pair of screwdrivers.
- An old toothbrush or small brush for scrubbing.
- A toothpick for getting into even smaller areas.
- A pair of tweezers to help you pick out any tiny bits that are stuck.
- A wrench.
- Some cotton swabs.
- A quality cleaning solution, like a boat cleaner. These are designed to handle grease, oil, dirt, and things like fish blood. Basically, everything you’re going to have on a fishing reel.
- A container to hold all of the parts.
- A clean, dry rag.
- Reel oil.
Never attempt to clean your fishing reel with a strong solvent. Never use anything like lighter fluid or gasoline. Just know that people have attempted it in the past if that sounds crazy to you. Problem: Solvents damage plastic components and remove the protective coating.
What Oils To Use
Using the proper oils for lubricating and safeguarding the internal components is crucial when it comes to fishing reel maintenance. Here are a few oils that are frequently suggested for maintaining fishing reels:
- Lucas Oil
- Ardent Reel Butter Grease
To keep your reel functioning smoothly, you should apply reel oil to all of its moving parts. This implies that your spool, as well as the bearings and other internal mechanics that enable the reel to function, should revolve smoothly when both casting and retrieving.
What Cleaners To Use
You’ll probably observe that there are numerous varieties of rod and reel cleaners available; these are great for removing grit and salt from your reel.
However, you could discover that using clean water and a damp cloth is equally simple. Water shouldn’t be a problem as long as you allow your reel to completely dry before storing it. As it should be done routinely following each fishing excursion, using clean water to rinse off your reel can be effective and one of the most frequent sorts of reel maintenance you perform.
Sand, grit, and dust can still impair your reel’s efficiency even if you fish in freshwater.
Cleaning Your Reel Prep
Here, we’ll do our best to make things as obvious as possible. Look up some YouTube videos if you have questions about the procedure. It can be helpful at times to really have the procedure spelled out in front of you. Going to a repair shop is also not harmful.
- Keep a notebook close by. Note the order in which you disassemble the objects. The operation of a fishing reel involves numerous little components. If you’ve never done it, it can be difficult to understand.
- Sticky notes are a good alternative that some individuals have utilized in the past. Remove a piece, and then write a number next to it on the sticky note. You’re less likely to become lost in confusion and everything will stay in its proper place. Additionally, you’ll be alerted to any missing items so you can search for them.
- Make certain you have a trustworthy set of tweezers. There are some really delicate pieces in your reel’s internal workings. These might get accidentally damaged by your fingers. Tweezers will give you more discretion. Although it may not be immediately apparent, body oils and hand sweat can erode these fragile regions. Take care of your pricey reel if you have one.
Soaking A Fishing Reel
Some individuals advise soaking as a cleaning method. It is intended to encourage deep cleaning. We won’t advise doing that in this instance. The likelihood that something will get into your fishing gear system increases the more you soak a fishing reel. Even the best fishing reels can only stand up to excess moisture and dampness. This will eventually wear it down.
How to Clean a Fishing Reel? [Step by Step]
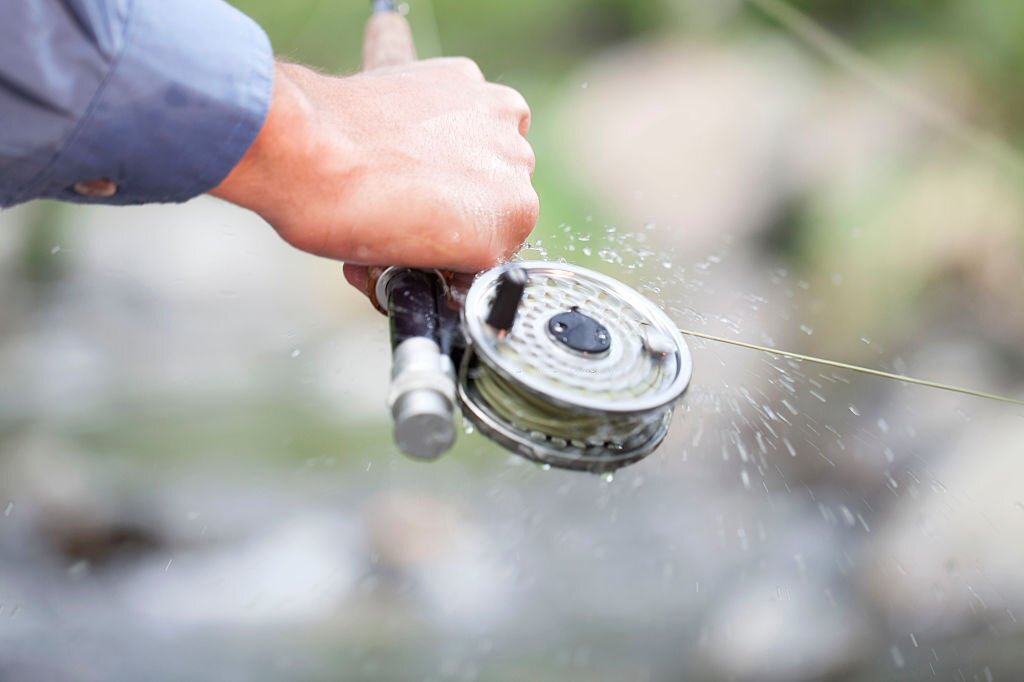
Step 1: Rinse Your Reel
Rinsing your reel with freshwater after each fishing trip is one of the most crucial things you can do to maintain it in good shape. This may be even more crucial if you’ve been ocean fishing, but even if you’ve simply been freshwater fishing, you should still rinse it.
If your hose has a mild spray setting, you can use it for this; otherwise, you risk pushing grit and salt deeper into the mechanisms. However, you might find it preferable to wet a cloth with clean water, then wipe the reel off before letting it dry.
This may be done after every trip and serves as the initial step before performing further maintenance on your reel; just be sure to let it dry completely before storing it.
Step 2: Grab Your Reel Assembly Instructions
Having the assembly instructions on hand might help ensure that you reassemble your reel properly if you’ve never taken it apart before.
If you believe it might help you remember where each item goes, you can also label or number the parts as you remove them. To prevent losing the pieces as you take them off, it can also be helpful to get a container.
Step 3: Remove The Spool
The cover plate typically needs to be unscrewed in order to remove the spool. Since most cover plates may be twisted counterclockwise in order to loosen and remove them, this should be a pretty simple process.
With some reels, such as some spin cast reels, you can discover that you need to tighten the drag system first before unscrewing the plate in a clockwise manner.
Step 4: Clean The Spool
To remove any dust and dirt that may have accumulated inside the spool, clean the spool and the spool shaft with a clean, moist cloth.
Apply a few drops of oil to the pin or guide that winds the fishing line as well as the spool shaft.
Step 5: Oil The Reel
Gently wipe the places where you applied the oil with a cotton Q-tip. The oil should be able to enter the reel further as a result, which should improve the movement of the moving parts.
Use a Q-tip or piece of cloth to carefully wipe the remaining moving parts after applying oil. To get the oil into the working parts, move the mechanisms. For instance, if you have a spinning reel, sprinkle a little oil onto the bail mechanisms and flip the bail back and forth.
Apply a small amount of oil to the spinning reel’s and bait caster’s moving components, such as the bearings, and then move the components after spreading the oil with a Q-tip.
Step 6: Remove The Handle
Remove the handle from your reel in accordance with the instructions that came with it. To do this, you might need a screwdriver, depending on your reel.
Step 7: Oil Your Handle
Use a Q-tip to gently rub the oil over the handle and the pieces that turn the spool after adding a few drops of oil to them.
When you don’t have the time to fully remove your spinning reel for maintenance, it is easy to oil it without having to take it apart completely.
A few times a year, disassembling your reel for cleaning and oiling helps keep the mechanisms in good working order and improves casting and reeling.
Step 8: Put Your Reel Back Together
This step might be considerably simpler if you have your assembly instructions close at hand.
You should be able to rebuild your reel, typically in the opposite order that you removed each component, assuming you have labeled or numbered your parts and stored them safely in a box.
Step 9: Wipe Your Reel Down
After reassembling your reel, clean it off with a fresh cloth or paper towel. After the mechanics have been greased, it may be a good idea to turn the reel handle to enable movement.
If you have a spinning reel, you can apply furniture polish as a final step and then remove it with a paper towel.
What to do if your reel still isn’t smooth after cleaning?
If your reel isn’t smooth even after cleaning, there are a few additional steps you can take to address the issue:
- Inspect for damage – Carefully examine the reel for any visible signs of damage or wear. Check the gears, bearings, and other moving parts to ensure they are functioning properly and not worn out. If you notice any significant damage, it may be necessary to replace or repair the affected components.
- Lubrication – Ensure that you have properly lubricated the reel after cleaning. Apply a suitable reel oil or grease to the gears, bearings, and other moving parts as recommended by the manufacturer. Insufficient or improper lubrication can cause friction and affect the smoothness of the reel.
- Reassemble correctly – Double-check that you have reassembled the reel correctly. Make sure all components are properly aligned and tightened. Improper assembly can cause misalignment and hinder the smooth operation of the reel.
- Seek professional assistance – If the reel still isn’t smooth despite your efforts, it may be beneficial to consult a professional or contact the reel manufacturer for further assistance. They can provide expert advice, diagnose any underlying issues, and suggest appropriate solutions or repairs.
Remember that regular maintenance and cleaning are crucial for reel performance, but in some cases, additional steps or professional help may be necessary to address persistent smoothness issues.
Short Fishing Tips for Cleaning Specific Reel Types
Spinning Reels
You should tighten the drag when cleaning the spinning reel from the outside without removing the spool to stop water from getting inside and harming delicate internal parts.
Don’t forget to loosen the drag before removing the spool. That is indeed one of the key justifications for using a sponge to clean the disassembled reel rather than running water.
If you tightened the drag while cleaning fishing reels, you should untighten it afterward and leave it that way when the reel is not in use to relieve strain on the drag washers.
To prevent the line from becoming entangled between the frame and the spool, tape it down before removing the spool. Remove the line in advance of removing the spool if you intend to replace it.
Spincast Reels
Absolute novices typically utilize spin-cast reels, which are almost entirely closed.
Daily cleaning should be done outside, and it should be rinsed with a short stream of flowing water before letting it air dry. After a few uses, you should take off the covers and the spool and clean it well with a moist sponge. Similar to the rotating one, you need completely remove it once a year and properly clean every component.
Don’t forget to periodically oil it.
Baitcaster Reels
The best baitcast reels are typically employed by more seasoned fishermen familiar with thoroughly cleaning spinning or spin-casting reels.
Use the techniques outlined for other reel types to clean it from the outside. Use the standard cleaning and greasing/oiling techniques when you open it to clean the inside, but keep in mind that the anti-reverse bearing should only ever be oiled with a very light oil that is lighter than the oil used for other components. And use a very small quantity. Anti-reverse is a moving part, despite some people’s claims to the contrary. The main distinction is that richer oils may hinder its performance, but again, complete dryness may also do so.
The pawl gear is quite difficult to assemble, so do not disassemble it. Bring the reel to the shop if you think there might be a problem. Simply clean it, blot off any excess moisture, and allow it to air dry. Once finished, apply oil.
Taking Apart Your Fishing Rod and Reel
The moment has come to begin cleaning your reel. It goes without saying that you should take the reel off the rod first. After that, it takes persistence and a steady hand to disassemble the reel.
- Start the procedure by unwinding the line from the spool or taping the line down. That will stop it from later becoming knotted.
- You must disassemble your spin-cast reel if you own one. Feed a portion of the line out before securing it.
- The spinner head and spool should be taken off after removing the reel cover. You need a little wrench for this.
- You may remove the middle shaft once the spinner head spool is out of the way. Next, remove the clutch ring, clutch washers, crank bearing, and crank handle. You should use your tweezers to take care of these portions. As you reach them, take them out one at a time, place them on some paper towels or your Post-it notes, and mark them in the correct order. There will be a lot of tiny, delicate components in this. You don’t want to forget where they go or lose any.
- You may now use your toothbrush to clean everything after taking everything apart. Use your cleaning solution to scrub the reel assembly’s interior. Once the bigger components have been cleaned, use the same brush to gently scrub the smaller components. Use a clean rag or follow up by wiping everything down. Hold them up for a second with the tweezers and inspect each side to make sure they are spotless.
- Before you put everything back together, you need to grease the components. To avoid corrosion, make sure you have the right oil or grease. To begin with, you should lubricate this crank and the shaft. that you might strike the pick-up arms, drag washers, center shaft, bushings, and other parts. On the handle knobs, ball bearings, kick lever, clutch ring, and spool release, apply oil. Verify that everything is going according to plan.Put everything back together by following your numbered instructions. Simply go in the other way from how you disassembled it.
Cleaning a Spinning Reel
The easiest reels to clean are often spinning ones. They are easier to disassemble than spin-cast reels. But that doesn’t mean you shouldn’t exercise caution and keep track of all the components.
- The reel needs to be properly cleaned with fresh water. We stated that we wouldn’t advise soaking your reel. But if you’re a saltwater fisherman, a spin casting reel can benefit from a brief bath. It’s a terrific technique to eliminate all the extra salt that you might otherwise forget about.
- As always, you should set up your line and location with a take before you begin.
- Once the spool has been taken out, begin by thoroughly cleaning it with your toothbrush.
- The spool bushings and washers can be removed with tweezers. The handle knobs, pick-up pin, and pick-up arm can then be taken off.
- The crankshaft can then be worked on after that. Take off the clutch screw, center shaft, and gears. The ball bearings and the roller wheel are the last things you want to remove. As you remove each item, don’t forget to record it. You can put it back in the correct sequence because it is numbered.
- With a little of your cleaning solution, clean each component separately with the toothbrush. When they’re done, gently dry them off with a soft cloth. Nothing should be accidentally bent or broken.
- Once everything is clean, you can oil the ball bearings, the spool release, the handle knobs, the arms, and the pickup pin. The ball bearings don’t need to be soaking wet or anything; don’t over-oil them.
- Apply some lubrication to the crank system’s remaining components and main shaft. Additionally, some lubrication may be needed for the bushings, washers, pick-up arm, and roller wheel.
- To remove grease, use a cotton swab or a Q-tip. You don’t want it to gather dust and filth inside and turn into sticky sludge.
- Put everything back together according to your written instructions. Simply follow the order in which you disassembled it. As we previously mentioned, spinning fishing reels are a little more user-friendly than spin casting or baitcasting reels.
Cleaning Baitcasting Reels
A baitcasting reel can be difficult to clean. Be careful to secure the line properly. Also, make sure you’re tracking all those small parts.
- You must turn the drag knob loose. At this time, the drag system, including the spool, can be removed.
- To clean the reel, use a toothbrush and some clean water. As much of the spool’s interior as you can clean.
- Turn the track tension knob off. Now you may remove the spool shaft and other components. Choose the gear, shaft guard, pinion gear, and stabilizer bar. The spool release, handle knobs, bushings, and release slider can all be removed. Take these pieces one at a time with the tweezers. Put them on Post-it notes with labels and numbers, or make a note of them in your notebook.
- Use your toothbrush to gently clean every component. Make use of your cleaning agent as well. The trick here is to be gentle, always.
- As thoroughly as you can, finish cleaning the reel’s interior. Use a fresh cloth to dry everything off after that.
- After cleaning everything, you must lubricate everything one more. The handle knobs and spool shaft can be oiled. Ensure that the stabilizer bar also has the ball bearings. Do not over-oil anything; they do not need to be submerged in it.
- The main gear, shaft guard, pinion yoke, and shaft gear can all be lubricated at this point. To remove any extra, use cotton swabs or Q-tips.
- You ought to be able to assemble everything once more at this point. Simply adhere to your printed instructions.
Keep Your Fishing Line Clean
Make sure to rinse your line and spool, especially if you fish in saltwater. After every use, wash the entire reel. Any reel will eventually be harmed by saltwater use. Keep the saltwater air moist. If you clean your rod and reel properly, it will last much longer.
Your best strategy is to perform a thorough cleaning each time you return from an ocean trip. Your reel has to be thoroughly cleaned. You must at least give it a rinse if that is not an option. However, it’s better than doing nothing, even though we don’t really advise it. If you can’t do a comprehensive clean due to time constraints, try your best to get the salt water off. We are aware that many anglers don’t always completely clean each sign, but doing so is best for your reel.
Don’t Over Lubricate Your Reel
You must apply oil since it will stop rust. You risk applying too much lubricant when using oil, in particular. Will do it with a little oil. Oil reels are rather light. Without a lot of pressure being applied, it can spread out and complete its task.
In fact, if you use it excessively, it may begin to impair performance. Additionally, as the actual becomes soiled once more, it will clog up more quickly. It might eventually do more harm than if you hadn’t used this much. Be sure to always have something on hand to wipe away any excess as you apply it.
Keep it Organized
The most crucial step in cleaning any fishing reel is this one. When you read the steps we’ve outlined, they seem rather easy. There are only a few things to do. However, if you lose track of when you removed each piece and where it went, the task may become too much for you to do. Label and number everything. Keep note of its whereabouts so you can return it quickly.
FAQs
1. How to clean your spinning reel after saltwater fishing?
Cleaning your spinning reel after saltwater fishing is crucial to prevent corrosion and maintain its performance. Here’s a brief guide to help you clean your reel effectively:
- Gather the necessary tools
- Rinse the reel: Use fresh water to thoroughly rinse the entire reel, paying close attention to remove any saltwater or debris. Rotate the handle to ensure water reaches all the parts.
- Disassemble if possible: If your reel allows for it, carefully remove the spool, handle, and other removable parts. This will enable you to clean hard-to-reach areas.
- Clean the exterior: Wipe the exterior of the reel with a soft cloth dampened with mild soap or reel cleaner. Gently scrub away any dirt or salt deposits, being careful not to damage delicate components.
- Clean the spool and line: If the spool is removable, clean it separately using the same mild soap or reel cleaner. Remove any line from the spool and wipe it clean.
- Clean the internal parts: Using a small brush, carefully clean the internal components such as gears, bearings, and the bail assembly. Be thorough but gentle to avoid causing any damage.
- Dry and lubricate: After cleaning, ensure that all parts are completely dry before applying lubrication. Use oil or grease as recommended by the manufacturer, applying a small amount to the gears, bearings, and other moving parts.
- Reassemble the reel: Once everything is clean and lubricated, carefully reassemble the reel, ensuring all parts are properly aligned and securely tightened.
2. When you don’t clean saltwater spinning reels?
When you don’t clean a saltwater spinning reel, the salt, dirt, and debris accumulated during fishing can lead to corrosion, rust, and mechanical issues. This can result in decreased reel performance, diminished smoothness in operation, and potential damage to the internal components. Regular cleaning is essential to maintain the reel’s functionality and prolong its lifespan.
3. How many times should you clean your saltwater reel?
The frequency of cleaning your saltwater reel depends on how often you use it and the conditions it is exposed to. As a general guideline, it is recommended to clean your saltwater reel after every trip in saltwater environments. This helps to remove any salt, dirt, or debris that may have accumulated and prevent corrosion. Regular cleaning and maintenance will help keep your saltwater reel in optimal condition and ensure its longevity.
4. What Tools and Products Do You Need to Clean Fishing Reels?
Here’re some items you need to clean your fishing reels.
- Simple Green Marine All-Purpose Boat Cleaner
- Two small screwdrivers
- A toothbrush or small paintbrush
- Toothpicks
- Cotton swabs
- Tweezers
- Reel oil
- Empty container
- Soft cloth
- Blow dryer
5. How to Clean Corrosion OFF Fishing Reels?
Reel cleaning products are produced by several companies that make fishing equipment, such as Penn Rod and Reel Cleaner and Penn Reel Grease and Oils for Fishing Reels. These are excellent for maintaining reels, preventing corrosion, and getting rid of minute corrosion remnants.
Vinegar is yet another easy technique. Some anglers remove damaged reel parts, soak them in vinegar for several hours (or overnight), and then scrub the corrosion away with a toothbrush. Although I can’t guarantee it won’t damage any delicate reel parts, especially on less expensive reels, this way is less expensive. Be cautious!
6. How to Clean Specific Fishing Reels Parts? [Bearings, Gears, etc.]
Reel operation is made smooth by bearings. Utilize a cotton swab and a toothpick to clean and oil them. To remove debris and used oil from the bearings, you can either use a specialist cleaning solution or soak cotton swabs in medicinal alcohol. You can give them a quick soak in the cleanser if they are extremely dirty.
Never soak them in the same water as gears or other components. Once the cleaning substance has been removed, let the area air dry. Verify their appropriate spinning and take out any skipped contaminants. Each bearing should have one little drop of oil applied to it.
The most crucial thing in this situation is to avoid using too much oil and to always put the oiled part—not just a bearing, but any part—back into the reel. Avoid returning it to the surface it came from because oil can pick up all kinds of minute contaminants from other surfaces.
Additionally, gears require cleaning. You can clean the reel’s gears with a toothbrush after it has been disassembled. Pay close attention to the pinion gear’s interior. After that, you can oil them and reinstall them.
Cleanse the remaining components in a similar manner. Drag washers and other minor, lightly filthy parts can simply be wiped with a cloth. If you have never disassembled your reel after a year of use, you will be shocked by how unclean it actually is.
Reel It In (Conclusion)
Cleaning your fishing reel is crucial for maintaining its performance and extending its lifespan. Rinse the reel with fresh water to remove salt, dirt, and debris. Clean the exterior with mild soap or reel cleaner, and use a small brush to clean internal components. Allow all parts to dry thoroughly before reassembling. Regular cleaning will keep your fishing reel in top condition for successful fishing trips.